Huawei B618 WLAN Settings

Huawei B618 WLAN Settings

  • Enabling or Disabling WLAN
    This section describes how to enable or disable Huawei B618 Router‘s WLAN.

Procedure

  1. Choose Settings> WLAN > WLAN Basic Settings .
  2. From WLAN module,select:
    • Enable: Enable WLAN
    • Disable: Disable WLAN


  • Setting the SSID of the WLAN
    The service set identifier (SSID) is a name that identifies a wireless local area network (WLAN). A wireless client (for example, a computer) can communicate with the Huawei B618 properly only when they are using the same SSID. To ensure the WLAN security, do not use the default SSID. You can define an SSID as required.
  • Changing the SSID
    This section describes how to change the service set identifier (SSID).

Procedure

  • Choose Settings > WLAN > WLAN Basic Settings .
  • From the SSID list, choose the SSID you want to change, and click Edit.
  • In SSID, enter the SSID.
  • Click Apply.


  • Enabling or Disabling the SSID Broadcast
    If the service set identifier (SSID) broadcast function is enabled, the Huawei B618 broadcasts the SSID of the wireless local area network (WLAN) facilitating clients’ access to the WLAN. The disadvantage is that unauthorized clients can also access the WLAN. If the SSID broadcast is disabled, the Huawei B618 does not broadcast the SSID of the WLAN. So the SSID must be entered manually and correctly from a client before the client accesses the WLAN. This improves the security of the WLAN.

Procedure

  1. Choose Settings> WLAN > WLAN Basic Settings .
  2. From the SSID list, choose the SSID you want to change, and click Edit.
  3. Set SSID broadcast.
    • Enable: to enable the SSID broadcast.
    • Disable: to disable the SSID broadcast.
  4. Click Apply.

 NOTE:

During the process of setting up the WLAN, you can set the SSID broadcast to Enable to facilitate the access from clients. After the WLAN is set up, set the SSID broadcast to Disable to improve the security of the WLAN.


  • Setting the WLAN Key
    To improve the security of the wireless local area network (WLAN), set a security key for the WLAN.

Procedure

  1. Choose Settings> WLAN > WLAN Basic Settings .
  2. From the SSID list, choose the SSID you want to change, and click Edit.
  3. Select Security mode.
    • None(open): No encryption. No security key is required when clients access the WLAN.

 NOTE:

For daily use, it is recommended that you set a security key, to improve the security performance of a WLAN.

  • WEP: This stands for Wired Equivalent Privacy.
  • WPA2-PSK: This is the second version of WPA-PSK and is more secure than WPA-PSK.
  • WPA/WPA2-PSK: Both WPA-PSK and WPA2-PSK encryption modes are supported. Clients can access the WLAN in WPA-PSK or WPA2-PSK
  1. Enter a security key.

 NOTE:

Select Show password to view the security key that you have entered.

  1. Click Apply.

Setting a WPA Security Key for the WLAN

  1. From Security mode, select WPA2-PSK.
  2. In WLAN key, enter the security key. For example, 12345678.
  3. Click Apply.


  • Selecting a Channel
    This section describes how to select a channel.

Procedure

  1. Choose Settings> WLAN > WLAN Advanced Settings.
  2. Select a channel from the Channel drop-down list box.
  3. Click Apply.

 NOTE:

If you do not know which channel to select, select Auto. The Huawei B618 4G Router will then automatically select a channel.


  • WPS
  • The Wi-Fi Protected Setup (WPS) is a standard used to set up wireless connections in an easy and secure way. Traditionally speaking, to set up a wireless connection, you have to set a WLAN name (SSID) and key for the Huawei B618, and enter the key on the client. WPS automatically configures an SSID and key for the Huawei B618 4G Router and client. You can conveniently and securely connect your client to the WLAN without having to remember the SSID and key.

Connecting a Client to the Mobile Broadband Through PIN

In Personal Information Number (PIN) mode, you can securely connect a client to the Huawei B618 4G Router ‘s WLAN by simply entering the client’s PIN on the Huawei B618 4G Router ‘s web management page. You can then access the Internet through the Huawei B618 4G Router.

Procedure

  1. Set the client’s WPS connection method to PIN, and record the PIN displayed on the client.

 NOTE:

For details about operations on the client, see the client’s user guide.

  1. On the Huawei B618‘s web management page, choose Settings> WLAN > WPS Settings .

 NOTE:

By default, WPS is set to On. If WPS is set to Off, WPS connection mode cannot be set.

  1. Choose Enter device PIN.
  2. Enter the client’s PIN in the PINtext box.
  3. Click Connect.


  • Connecting a Client to the Mobile Broadband Through PBC

In Push Button Configuration (PBC) mode, you can connect a client to the Huawei B618‘s WLAN simply by pushing the WPS button. You can then access the Internet through the Huawei B618.

Procedure

  1. On the Mobile Broadband‘s web management page, choose Settings> WLAN > WPS Settings .

 NOTE:

By default, WPS is set to On. If WPS is set to Off, the WPS connection mode cannot be set.

  1. From the Working band drop-down list, select the working frequency band.
  2. Choose PBC.
  3. Press the WPS button on the client.
  4. Click Connecton the Huawei B618‘s web management page.

 NOTE:

  • For details about operations on the client, see the client’s user guide.
  • Click Connecton the Huawei B618‘s web management page within 2 minutes after you press the WPS button on the client.


  • Connecting a Client to the Mobile Broadband Through AP PIN

In AP Personal Information Number (PIN) mode, you can securely connect a client to the Huawei B618‘s WLAN by simply entering the Huawei B618‘s PIN on the client. You can then access the Internet through the Huawei B618.

Procedure

  1. On the Huawei B618‘s web management page, choose Settings> WLAN > WPS Settings .

 NOTE:

By default, WPS is set to On. If WPS is set to Off, the WPS connection mode cannot be set.

  1. Obtain the Huawei B618‘s PIN using either of the following methods:
    • Click Generate PIN to obtain the randomly generated PIN.
    • Click Reset PINto obtain the initial PIN.
  2. Set the client’s WPS connection mode to AP PIN, and enter the Huawei B618‘s PIN on the client.

 NOTE:

For details about operations on the client, see the client’s user guide.


  • Setting WLAN MAC Filtering

You can control and manage the clients that access the wireless local area network (WLAN) to improve the security performance of the WLAN.

Procedure

  1. Choose Settings> WLAN > WLAN MAC Filter .
  2. From WLAN MAC Filter, select a Media Access Control (MAC) filtering mode.
    • Disable: to disable the function of filtering MAC addresses.
    • Allow: If the MAC address of a client is listed in MAC Address, the client is allowed to connect to the Huawei B618 over the WLAN.
    • Deny: If the MAC address of a client is listed in MAC Address, the client is prohibited from connecting to the Huawei B618 over the WLAN.
  3. In MAC Address, enter the MAC addresses of the clients to be controlled.
  4. Click Apply.
  • Allowing Specified Clients to Access the WLAN
  1. Click Settings> Security > Device Management . From the MAC Address column under Connected WLAN clients, find the MAC addresses of clients whose access to the WLAN is allowed. For example, 40:4D:8E:6D:80:7D.
  2. Choose Settings> WLAN > WLAN MAC Filter . From WLAN MAC Filter, select Allow.
  3. In MAC Address, enter 40:4D:8E:6D:80:7D.
  4. Click Apply.


  • Specifying the WLAN Bandwidth

The wireless local area network (WLAN) bandwidth is the transmission frequency bandwidth of the Huawei B618. A greater transmission frequency bandwidth indicates a faster data transmission speed and lower penetrability.

Procedure

  1. Choose Settings> WLAN > WLAN Advanced Settings .
  2. Select the desired WLAN bandwidth from the Wi-Fi bandwidth drop-down list box.
  3. Click Apply.


Check more details about Huawei B618 4G Router here: https://www.4gltemall.com/huawei-b618-lte-cat11-router.html
 

Huawei B618 Time Service Settings

Time Service Settings

Network time synchronization function will be activated or deactivated by enabling or disabling SNTP.

  • Enabling SNTP
    Enabling Simple Network Time Protocol (SNTP) and synchronizing the Huawei B618 Router time allows you to maintain the same time as the server.


Enabling SNTP

Enabling Simple Network Time Protocol (SNTP) and synchronizing the Huawei B618 Router time allows you to maintain the same time as the server.

Procedure

  1. Choose Settings> System > Time Service Settings.
  2. Select the SNTP check box.
  3. Select Primary NTP server, which is the preferred server for time synchronization.
  4. Select Secondary NTP server, which is the backup server for time synchronization.
  5. Select Local time zone.
  6. Click Apply.


Check more details about Huawei B618 4G Router here: https://www.4gltemall.com/huawei-b618-lte-cat11-router.html
Huawei B618 System Management

  • Viewing Mobile Broadband Information
    This section describes how to view the information about the Huawei B618.


  • Switching Between Languages
    This section describes how to switch between the Huawei B618‘s user interface languages.


  • Changing the Password
    To prevent unauthorized access to the management page, change the login password.


  • Restoring Default Settings
    After you restore the Huawei B618to its default settings, your personal information will be deleted, and parameters will be restored to their default values.


  • Rebooting the Mobile Broadband
    This section describes how to reboot the Huawei B618.


  • Diagnosing Network Connection Exceptions
    If the Huawei B618 cannot connect to the Internet, use the diagnostics tools to identify the possible causes.


  • System logs
    Logs record user operations and key running events.


  • Setting the Antenna Type
    This topic describes how to set the antenna type.


  • Setting Auto Update
    You can perform this task to enable system auto update.


  • Update Settings
    Once this feature is enabled, you will be able to perform an online update without logging in to the configuration management page.


  • Setting Up Critical Updates
    Once you enable critical updates, the system will automatically install critical updates from the server.


  • Scheduled restart
    You can set the system to restart within the specified time period.


——————————————————————————————————————–


Viewing Mobile Broadband Information

This section describes how to view the information about the Huawei B618.

Procedure

  1. Choose Settings> System > Device Information .
  2. View Huawei B618


———————————————————-

Switching Between Languages

This section describes how to switch between the Huawei B618‘s user interface languages.

Procedure

  1. Click the drop-down list in upper right corner of the page.
  2. From the language drop-down list, select the desired language.


———————————————————-

Changing the Password

To prevent unauthorized access to the management page, change the login password.

Procedure

  1. Choose Settings> System > Modify Password .
  2. Enter the current password.
  3. Enter a new password and confirm it.

 NOTE:

The password can contain a maximum of 32 characters, including numbers, letters (upper or lower case), space, and the following symbols: ! # $ ( ) * – . / = @ [ ] ^ _ ` { } ~ |

Password strength rules

  • Low password: password length is less than 6 characters and includes only one of the following: lowercase letters, uppercase letters, numbers, and symbols, or the password is the same as the user name or the user name spelled backwards.
  • General password: password length is from 6 to 10 characters and includes two combinations of any of the following: lowercase letters, uppercase letters, numbers, and symbols.
  • High password: password length is greater than 10 characters and includes two combinations of any of the following: lowercase letters, uppercase letters, numbers, and symbols. Alternatively, the password length is greater than or equal to 6 and you must include three combinations of the preceding character requirements.

A strong password cannot contain repeated letters, numbers, or symbols for more than 1/3 of the total length. A general password cannot contain repeated letters, numbers, or symbols for more than 2/3 of the total length. For example, in “11aaa”, two characters are repeated, therefore the repeat length is 5.

  1. Click Apply.


———————————————————-

Restoring Default Settings

After you restore the Huawei B618 to its default settings, your personal information will be deleted, and parameters will be restored to their default values.

Procedure

  1. Choose Settings> System > Restore Defaults .
  2. Click Restore.


———————————————————-

Rebooting the Mobile Broadband

This section describes how to reboot the Huawei B618.

Procedure

  1. Choose Settings> System > Restart.
  2. Click Restart.


———————————————————-

Diagnosing Network Connection Exceptions

If the Huawei B618 cannot connect to the Internet, use the diagnostics tools to identify the possible causes.

  • Performing a Ping Test
    If the Huawei B618 cannot connect to the Internet, perform a ping test to identify the possible causes.
  • Performing a Traceroute Test
    If the Huawei B618 cannot connect to the Internet, perform a traceroute test to identify the possible causes.


Performing a Ping Test

If the Huawei B618 cannot connect to the Internet, perform a ping test to identify the possible causes.

Procedure

  1. Choose Settings> System > Diagnosis .
  2. Select Pingfrom the Diagnosis method drop-down list box.
  3. In the Destination IP address/domain name text box, enter the IP address or domain name, for example www.google.com.
  4. Set Timeout period.
  5. Click Apply.

The diagnostics results are displayed in the Result area on the bottom of the page.


Performing a Traceroute Test

If the Huawei B618 cannot connect to the Internet, perform a traceroute test to identify the possible causes.

Procedure

  1. Choose Settings> System > Diagnosis .
  2. Select Traceroutefrom the Diagnosis method drop-down list box.
  3. In the Destination IP address/domain name text box, enter the IP address or domain name, for example www.google.com.
  4. Set Maximum hops and Timeout period.
  5. Click Apply.

The diagnostics results are displayed in the Result area on the bottom of the page.


———————————————————-


System logs

Logs record user operations and key running events.

Procedure

  1. Choose Settings> System > System Logs .
  2. Select the corresponding log level from the Display type drop-down list.
  3. Select the corresponding log level from the Display level drop-down list.

 NOTE:

All logs are displayed in the output box.


———————————————————-

Setting the Antenna Type

This topic describes how to set the antenna type.

Procedure

  1. Choose Settings> System > Antenna Settings .
  2. Select the antenna type from the drop-down list.
  3. Click Apply.


———————————————————-

Setting Auto Update

You can perform this task to enable system auto update.

Procedure

  1. Select Settings> System > System Settings.
  2. Select Auto update.


———————————————————-

Update Settings

Once this feature is enabled, you will be able to perform an online update without logging in to the configuration management page.

Context

  • The update without login feature is enabled by default on all software versions that support this feature.
  • Once enabled, all Wi-Fi users connected to Huawei B618 can update the device without logging in. If you do not wish to let other users perform an update, it is recommended that you disable this feature to avoid security risks.

Procedure

  1. Choose Settings> System > System Settings.
  2. Select Online update settings.


———————————————————-

Setting Up Critical Updates

Once you enable critical updates, the system will automatically install critical updates from the server.

Context

  • Critical updates is enabled by default.
  • When this function is enabled, the system will automatically install critical updates from the server. If you do not want automatic updates, you can disable this function to prevent security risks.

Procedure

  1. Choose Settings> System > System Settings .
  2. Select Critical update settings.


———————————————————-

Scheduled restart

You can set the system to restart within the specified time period.

Procedure

  1. Choose Settings> System > System Settings .
  2. Select the Scheduled restart check box.


Check more details about Huawei B618 4G Router here: https://www.4gltemall.com/huawei-b618-lte-cat11-router.html
Huawei B618 Security Settings

  • Enabling or Disabling the Firewall
    The Huawei B618 4G Router supports the firewall function to control the transmission of data streams and protect your local area network from unauthorized access.


  • Setting LAN IP Filtering
    The LAN IP address filtering function is used to block specified clients in the LAN from accessing specified Internet services.


  • Configuring a Virtual Server
    The Huawei B618 4G Router supports the virtual server to enable external users to use the services provided in the local area network (LAN) using the Hypertext Transfer Protocol (HTTP), File Transfer Protocol (FTP), and other protocols.


  • Configuring a Special Application
    The Huawei B618 4G Router supports the function to use a special application to configure dynamic port forwarding. Certain applications in the local area network (LAN) must use a specified port of the firewall to access remote applications. To set up a Transmission Control Protocol and User Datagram Protocol (TCP/UDP) connection between an application in the LAN and a remote application, the firewall uses this port forwarding function to open the required port.


  • Setting the DMZ
    If external users cannot access certain network services provided by the local area network (LAN), use the DMZ function provided by the Huawei B618 4G Router to set the client that provides the required network services as the DMZ host; external users can then access these services properly. DMZ is an acronym for the demilitarized zone in networks.


  • Setting the SIP ALG
    The Session Initiation Protocol (SIP) is a control protocol at the Application Layer. It is used to initiate, change, or end a session. An application-level gateway (ALG) is a specific application of SIP and is used to check the status of data packages. To complete a SIP application, enable the SIP ALG.


  • Setting the UPnP
    The Universal Plug and Play (UPnP) service realizes intelligent connection between two UPnP devices using port forwarding. UPnP devices can obtain IP addresses automatically and access the Internet dynamically.


  • Configuring NAT
    Network address translation is the process of modifying source and destination IP addresses when IP packets are transmitted across a router or firewall. The purpose of this process is to translate internal (private) IP addresses into external (public) IP addresses to provide a solution to the impending exhaustion of IP addresses. Huawei B618 4G Router supports port-restricted cone NAT and symmetric NAT. You can configure the NAT settings as required.


  • Filtering Specified Websites
    The Huawei B618 4G Router enables you to specify and filter websites.


  • Setting the DDNS
    The Dynamic Domain Name Server (DDNS) is a system that associates a network address with a dynamic IP address. After you configure the DDNS, the Huawei B618 4G Router sends the dynamic IP address of a computer to the DDNS. The DDNS then associates the updated IP address with the specified network address so that Internet users can use this network address to access the resources that you provide.


  • Filtering Specified Devices
    The MAC filtering function of the Huawei B618 4G Router can filter specified devices on the Huawei B618 4G Router local area network (LAN) so these devices are prevented from accessing the Internet or other devices on the same LAN.


——————————————————————————————————————–


Enabling or Disabling the Firewall

The Huawei B618 LTE Router supports the firewall function to control the transmission of data streams and protect your local area network from unauthorized access.

Procedure

  1. Choose Settings> Security > Firewall.
  2. Select Enable firewall to enable the firewall or clear it to disable the firewall.

 NOTE:

Other parameters are available only if you select Enable firewall.

  1. Select Enable IP address filter to enable the function of filtering IP addresses.
  2. Select Disable WAN port ping to disable the ping function.
  3. Select Enable domain name filter to enable the function of filtering URLs.
  4. Select Enable MAC filter to enable the MAC filtering function.
  5. Click Apply.


———————————————————-

Setting LAN IP Filtering

The LAN IP address filtering function is used to block specified clients in the LAN from accessing specified Internet services.

Prerequisite

The IP address filtering function is enabled. For details, see Enabling or Disabling the Firewall.

Context

The following table lists common protocols at the application layer of TCP/IP.

Protocol Default Port Service Provided
HTTP 80 Browse web pages.
SMTP 25 Send emails.
POP3 110 Receive emails.
FTP 21 Transfer files.
TELNET 23 Log in to a remote computer.

 NOTE:

For details about the port used for a service, contact your service provider.

Procedure

  1. Choose Settings> Security > LAN IP Filter .
  2. Choose one of the following options:
    • Blacklist: Set the websites that you do not want users to access.
    • Whitelist: Set the websites that users are allowed to access.
  3. Click Add and set the parameters.
  4. Click OK to save the settings.

 NOTE:

  • Click Edit to edit a selected item in the list.
  • Click Delete to delete a selected item from the list.
  1. Click Apply for the settings to take effect.

Restricting Clients in a WLAN from Accessing Specified Websites

For example, if you want to restrict a client (192.168.1.101) in a WLAN from accessing www.abc.com, perform the following steps:

  1. Choose Settings> Security > LAN IP Filter .
  2. Select Blacklist.
  3. Click Add and set the parameters.
LAN IP Address Enter 192.168.1.101.

NOTE:

You can view the IP addresses of the clients connected to the Huawei B618 under the Connected WLAN clients section on the Statistics page.

LAN Port Enter 80.
WAN IP Address a.       On your computer, choose Start > Run.

b.      Enter cmd and press Enter.

c.       In the displayed window, enter ping www.abc.com and press Enter.

d.      View the IP address of www.abc.com. For example, it is 1.2.3.4.

e.       In the text box for Huawei B618, enter 1.2.3.4.

NOTE:

The Windows 7 operating system is used in this example to describe how to obtain WAN IP addresses.

WAN Port Enter 80.
Protocol Select TCP/UDP.

NOTE:

If you do not know the protocol, select TCP/UDP. The Mobile Broadband will automatically select an appropriate protocol.

Status Select On.
Options Click OK.
  1. Click Apply for the settings to take effect.


———————————————————-

Configuring a Virtual Server

The Huawei B618 LTE CPE supports the virtual server to enable external users to use the services provided in the local area network (LAN) using the Hypertext Transfer Protocol (HTTP), File Transfer Protocol (FTP), and other protocols.

Procedure

  1. Choose Settings> Security > Virtual Server .
  2. Click Add and set the parameters.
  3. Click OK to save the settings.

 NOTE:

  • Edit: to edit an item.
  • Delete: to delete an item.
  1. Click Apply for the settings to take effect.

Configuring an FTP Server

To enable a client whose IP address is 192.168.8.101 to provide FTP services and be accessed by external users, do the following:

  1. Configure a virtual server.
Name WAN Port LAN IP Address LAN Port Protocol Status
My FTP server 21-22 192.168.8.101 23-24 TCP On
  1. Choose Settings> System > Device Information , view the wide area network (WAN) IP address of the Huawei B618. For example 10.2.1.123.
  2. In the browser of an external user, enter the FTP server address (ftp://10.2.1.123) and access the FTP services provided by the client whose IP address is 192.168.8.101.

 NOTE:

If the default service port is 21-22, the external user should enter ftp://10.2.1.123:21 or ftp://10.2.1.123:22 to access the FTP server.


———————————————————-

Configuring a Special Application

The Huawei B618 LTE CPE supports the function to use a special application to configure dynamic port forwarding. Certain applications in the local area network (LAN) must use a specified port of the firewall to access remote applications. To set up a Transmission Control Protocol and User Datagram Protocol (TCP/UDP) connection between an application in the LAN and a remote application, the firewall uses this port forwarding function to open the required port.

Procedure

  1. Choose Settings> Security > Special Applications.
  2. Click Add and set the parameters.
  3. Click OK to save the settings.

 NOTE:

  • Edit: to edit an item.
  • Delete: to delete an item.
  1. Click Apply for the settings to take effect.

Example of the Configuration of a Special Application

A client in the LAN uses TCP to access the MSN game server through port 47624. When the game starts, the game server uses TCP and port 2400 to set up a connection to the client that tries to access the server. In this case, you must configure dynamic port forwarding, because the game conflicts with the following default firewall rules:

  • The firewall blocks external data input.
  • The game server can send a connection request to the external IP address of the Huawei B618 but cannot send the request to the LAN client that tries to access the game server, because the IP addresses of clients are not open to external devices.

To solve this problem, you must define a set of port forwarding rules. When the client in the LAN sends data to TCP port 47624, the rules allow data input from TCP port 2400. Then data from the game server can be received from and transmitted to the LAN client that sends data to TCP port 47624.

Name Status Trigger Port Trigger Protocol Open Protocol Open Port
MSN Gaming Zone On 47624 TCP TCP 2400

 NOTE:

For details about Trigger Port, Open Port, Trigger Protocol, and Open Protocol, contact your service provider.


———————————————————-

Setting the DMZ

If external users cannot access certain network services provided by the local area network (LAN), use the DMZ function provided by the Huawei B618 to set the client that provides the required network services as the DMZ host; external users can then access these services properly. DMZ is an acronym for the demilitarized zone in networks.

Prerequisite

DMZ users are not protected by the firewall and may be easily attacked. In addition, the security of other users in the LAN is compromised.

Procedure

  1. Choose Settings> Security > DMZ Settings.
  2. Select:
    • Enable: to enable the DMZ function.
    • Disable: to disable the DMZ function.
  3. In DMZ IP address:, enter the IP address of the client to be set as the DMZ host.

 NOTE:

One client can be set as the DMZ host at a time.

  1. Click Apply.


———————————————————-

Setting the SIP ALG

The Session Initiation Protocol (SIP) is a control protocol at the Application Layer. It is used to initiate, change, or end a session. An application-level gateway (ALG) is a specific application of SIP and is used to check the status of data packages. To complete a SIP application, enable the SIP ALG.

Procedure

  1. Choose Settings> Security > SIP ALG Settings.
  2. Select Enable SIP ALG to enable the SIP ALG.
  3. In SIP port, enter the SIP port number provided by your service provider.
  4. Click Apply.


———————————————————-

Setting the UPnP

The Universal Plug and Play (UPnP) service realizes intelligent connection between two UPnP devices using port forwarding. UPnP devices can obtain IP addresses automatically and access the Internet dynamically.

Procedure

  1. Choose Settings> Security > UPnP Settings.
  2. Select:
    • Enable: to enable the UPnP service.
    • Disable: to disable the UPnP service.
  3. Click Apply.


———————————————————-

Configuring NAT

Network address translation is the process of modifying source and destination IP addresses when IP packets are transmitted across a router or firewall. The purpose of this process is to translate internal (private) IP addresses into external (public) IP addresses to provide a solution to the impending exhaustion of IP addresses. Huawei B618 LTE CPE supports port-restricted cone NAT and symmetric NAT. You can configure the NAT settings as required.

Procedure

  1. Choose Settings> Security > NAT Settings.
  2. Select from the following options:
    • Cone: to enable port-restricted cone NAT. This type of NAT are more compatible with applications (including applications on game devices), although it provides lower security.
    • Symmetric: to enable symmetric NAT. This type of NAT are generally adopted by gateways with higher security.
  3. Click Apply.


———————————————————-

Filtering Specified Websites

The Huawei B618 LTE Gateway enables you to specify and filter websites.

Procedure

  1. Choose Settings> Security > Domain Name Filter.
  2. Choose one of the following options:
    • Blacklist: Set the websites that you do not want users to access.
    • Whitelist: Set the websites that users are allowed to access.
  3. Click Add.
  4. In Domain Name, enter the address of the website you want to filter.
  5. From the Status drop-down list, select On.
  6. Click OK.
  7. Click Applyfor the settings to take effect.


———————————————————-

Setting the DDNS

The Dynamic Domain Name Server (DDNS) is a system that associates a network address with a dynamic IP address. After you configure the DDNS, the Huawei B618 sends the dynamic IP address of a computer to the DDNS. The DDNS then associates the updated IP address with the specified network address so that Internet users can use this network address to access the resources that you provide.

Procedure

  1. Choose Settings> Security > DDNS.
  2. Click Add.
  3. Set DDNS parameters.

 NOTE:

The user name and password must be registered on the website of the DDNS service provider.

  1. Click OK.

Example

To share large files or videos with Internet users:

  1. Register a DDNS user name and password on a DDNS service provider. For example, register an account with both the user name and password as admin on http://www.dyndns.org/.
  2. Choose Settings> Security > DDNS.
Service Provider Status Domain Name User name Password
DynDNS.org On www.abc.com admin admin
  1. Click OK.
  2. Internet users will then be able to access your resources by accessing abc.comfrom their browsers.


———————————————————-

Filtering Specified Devices

The MAC filtering function of the Huawei B618 4G Router can filter specified devices on the Huawei B618 4G Router local area network (LAN) so these devices are prevented from accessing the Internet or other devices on the same LAN.

Procedure

  1. Choose Settings> Security > MAC Filter.
  2. Select an MAC filtering mode from the Filtering mode: drop-down list box.
    • Disable: Disable the MAC filtering function.
    • Allow: If the MAC address of a client is in the MAC Address list, the client is allowed to connect to the Huawei B618 4G Router.
    • Deny: If the MAC address of a client is in the MAC Address list, the client is not allowed to connect to the Huawei B618 4G Router.
  3. In the MAC Address text box, enter the MAC address of the client you want to filter.
  4. Click Apply.


Check more details about Huawei B618 4G Router here: https://www.4gltemall.com/huawei-b618-lte-cat11-router.html
Huawei B618 VoIP Settings

VoIP

The Huawei B618 4G Router supports voice services based on the Session Initiation Protocol (SIP) and voice calls between the Internet and Public Switched Telephone Network (PSTN).

  • Configuring an SIP Server
    Configure parameters for the SIP registration and agent servers according to the instructions on this page.
  • Managing SIP Accounts
    The Huawei B618 lets you add, modify, or delete your SIP accounts and view their registration status.
  • Managing Speed-Dial Numbers
    Assign short and easy-to-remember speed-dial numbers for your contacts. You can then simply dial the speed-dial number instead of entering the entire number. The Huawei B618 Router lets you add, modify, or delete your speed-dial numbers.
  • Configuring Advanced Voice Settings
    This topic describes how to configure advanced voice settings. It is recommended that you retain the default settings.
  • Setting the Codecs
    You can configure voice codec settings. However, you are recommended to retain the default settings.


——————————————————————————————————————–


Configuring an SIP Server

Configure parameters for the SIP registration and agent servers according to the instructions on this page.

Procedure

  1. Choose Settings> VoIP > SIP Server .
  2. In Proxy server address, enter the IP address or domain name provided by your service provider.
  3. In Proxy server port, enter the port provided by your service provider.
  4. In Registration server address, enter the IP address or domain name of the registration server provided by your service provider.
  5. In Registration server port, enter the port of the registration server provided by your service provider.
  6. In SIP server domain name, enter the domain name of the SIP server.

 NOTE:

If Secondary server is selected, follow the preceding steps to configure the parameters for it.

  1. Click Apply.


——————————————————————————————————————–

Managing SIP Accounts

The Huawei B618 4G Router lets you add, modify, or delete your SIP accounts and view their registration status.

  • Adding an SIP Account
    Add an SIP account according to the instructions on this page.
  • Modifying an SIP Account
    Modify an SIP account according to the instructions on this page.
  • Deleting an SIP Account
    Delete a SIP account according to the instructions on this page.
  • Checking the SIP Account Registration Status
    Check your SIP accounts and their registration status according to the instructions on this page.


Adding an SIP Account

Add an SIP account according to the instructions on this page.

Prerequisite

Before you configure an SIP account, configure the SIP server. For details, see Configuring an SIP Server.

Procedure

  1. Choose Settings> VoIP > SIP Account.
  2. Click Add.
  3. In SIP Account, enter the account number provided by your service provider.
  4. In User nameand Password, enter your user name and password provided by your service provider for voice services.
  5. Click OK.


Modifying an SIP Account

Modify an SIP account according to the instructions on this page.

Procedure

  1. Choose Settings> VoIP > SIP Account.
  2. Click Edit.
  3. In SIP Account, modify the account number.
  4. In User name and Password, modify your user name and password for voice services.
  5. Click OK.


Deleting an SIP Account

Delete a SIP account according to the instructions on this page.

Procedure

  1. Choose Settings> VoIP > SIP Account.
  2. Click Delete.
  3. From the displayed dialog box, click OK.


Checking the SIP Account Registration Status

Check your SIP accounts and their registration status according to the instructions on this page.

Procedure

  1. Choose Settings> VoIP > SIP Account.
  2. In Registration Status, view the registration status of all your SIP accounts.


——————————————————————————————————————–


Managing Speed-Dial Numbers

Assign short and easy-to-remember speed-dial numbers for your contacts. You can then simply dial the speed-dial number instead of entering the entire number. The Huawei B618 4G Router lets you add, modify, or delete your speed-dial numbers.

  • Adding a Speed-Dial Number
    Add a speed-dial number according to the instructions on this page.
  • Modifying a Speed-Dial Number
    Modify a speed-dial number according to the instructions on this page.
  • Deleting a Speed-Dial Number
    Delete a speed-dial number according to the instructions on this page.


Adding a Speed-Dial Number

Add a speed-dial number according to the instructions on this page.

Procedure

  1. Choose Settings> VoIP > Speed Dial .
  2. Click Add.
  3. In Speed Dial Number, enter a number easy to remember.
  4. In Actual Number, enter the actual number.
  5. In Description, enter a description for the speed-dial number.
  6. Click OK.
  7. Click Apply.


Modifying a Speed-Dial Number

Modify a speed-dial number according to the instructions on this page.

Procedure

  1. Choose Settings> VoIP > Speed Dial .
  2. Click Edit.
  3. In Speed Dial Number, modify a speed-dial number.
  4. In Actual Number, modify the actual number.
  5. In Description, change the description.
  6. Click OK.
  7. Click Apply.


Deleting a Speed-Dial Number

Delete a speed-dial number according to the instructions on this page.

Procedure

  1. Choose Settings> VoIP > Speed Dial .
  2. Click Delete.
  3. From the displayed dialog box, click OK.
  4. Click Apply.


——————————————————————————————————————–


Configuring Advanced Voice Settings

This topic describes how to configure advanced voice settings. It is recommended that you retain the default settings.

Procedure

  1. Choose Settings> VoIP > Advanced Voice Settings.
  2. From the DTMF mode drop-down list, select a method for transmitting DTMF messages during calls.
  3. From the Fax protocol drop-down list, select a method for transmitting faxes.
  4. From the Outgoing list drop-down list, select a method.
  5. Click Apply.


Setting the Codecs

You can configure voice codec settings. However, you are recommended to retain the default settings.

Procedure

  1. Choose Settings> VoIP > Advanced Codec Settings.
  2. From the Primary codec type drop-down list, choose the first voice codec type.
  3. From the Secondary codec type drop-down list, choose the second voice codec type.
  4. From the Third codec type drop-down list, choose the third voice codec type.
  5. From the Fourth codec type drop-down list, choose the fourth voice codec type.
  6. From the Fifth codec type drop-down list, choose the fifth voice codec type.
  7. From the Sixth codec type drop-down list, choose the sixth voice codec type.
  8. Click Apply.


Check more details about Huawei B618 4G Router here: https://www.4gltemall.com/huawei-b618-lte-cat11-router.html
Huawei B618 DHCP Settings

Huawei B618 DHCP Settings

  • Enabling the DHCP Server
    If the Dynamic Host Configuration Protocol (DHCP) server is enabled, the Mobile Broadband allocates IP addresses to clients connected to it.
  • Disabling the DHCP Server
    If the Dynamic Host Configuration Protocol (DHCP) server is disabled, the Mobile Broadband does not allocate IP addresses to clients connected to it and IP addresses must be entered from each client.
  • Configuring DHCP Clients
    If the Dynamic Host Configuration Protocol (DHCP) server is enabled, certain settings must be configured on clients.


Huawei B618 Enabling the DHCP Server

If the Dynamic Host Configuration Protocol (DHCP) server is enabled, the Huawei B618 4G Router allocates IP addresses to clients connected to it.

Context

  • DHCP IP rangeand DHCP lease time (s) are available to be set only when the DHCP server is enabled.
  • After the DHCP server is enabled, enable the function to automatically obtain an IP address and a DNS server address from clients.

Procedure

  1. Choose Settings> DHCP.
  2. In IP address, enter the two last digits of the Huawei B618 4G Router‘s IP address.
  3. Select Enable to enable the DHCP server.
  4. In DHCP IP range, enter the last digit of the start IP address and the end IP address.
  5. In DHCP lease time (s), enter a lease time.
  6. Click Apply.


Huawei B618 Disabling the DHCP Server

If the Dynamic Host Configuration Protocol (DHCP) server is disabled, the Huawei B618 4G Router does not allocate IP addresses to clients connected to it and IP addresses must be entered from each client.

Procedure

  1. Choose Settings> DHCP.
  2. Select Disableto disable the DHCP server.
  3. Click Apply.


Huawei B618 Configuring DHCP Clients

If the Dynamic Host Configuration Protocol (DHCP) server is enabled, certain settings must be configured on clients.

Context

The following describe how to configure DHCP settings on a computer running Windows 7 as an example.

Procedure

  1. Choose Start> Control Panel.
  2. From the Viewed bydrop-down list, choose Category.
  3. Choose Network and Internet> Network and Sharing Center > Change adapter settings > Wireless Network Connection .
  4. Right click the network icon that you want to configure and choose Properties.
  5. On the Networking tab page, choose Internet Protocol Version 6 (TCP/IPv6) or Internet Protocol Version 4 (TCP/IPv4), and then click Properties.
  6. On the Internet Protocol 6 (TCP/IPv6) Properties dialog box, select Obtain an IPv6 address automatically and Obtain DNS server address automatically. Or on the Internet Protocol 4 (TCP/IPv4) Properties dialog box, select Obtain an IP address automatically and Obtain DNS server address automatically.
  7. Click OK.

Check more details about Huawei B618 4G Router here: https://www.4gltemall.com/huawei-b618-lte-cat11-router.html
Huawei B618 Sharing Files Using Samba

The Samba Service allows computers running different operating system to access files in the USB storage device connected to Huawei B618 4G Router.

Prerequisite

Before you use the Samba Service, set the user rights and accessible folders. For details, see Setting User Rights.

Procedure

  1. Choose More> Sharing > Samba Server .
  2. Select Enable Samba sharing.

Example

A USB storage device connected to Huawei B618 4G Router contains photos, videos, and audio clips. User A wants to edit the photos, while user B wants to copy the videos. Due to security reasons, user A must be prevented from copying the videos, and user B must be prevented from viewing the photos. In this scenario, you can use Samba to set different folder access rights for different users.

 NOTE:

The computer runs Windows 7.

  1. Choose More> Sharing > Samba Server .
  2. Select Enable Samba sharing.
  3. Choose More> Sharing > User Settings.
  4. Click Add.
  5. Set the read/write and folder access rights for users A and B.
User name Password Confirm password Rights Directory
admin1 admin123 admin123 Read/Write The folder where the photos are saved
admin2 admin234 admin234 Read only The folder where the videos are saved
  1. Choose Start> Run , enter \\192.168.8.1, and press Enter.
  2. If your device supports IPv6, please go to Start> Run,enter the IPv6 address, and then press Enter.

 NOTE:

Set the IPv6 address as follows: Prefix the address with two backslashes (\\), substitute the colon (:) with a hyphen (-), and use .ipv6-literal.net as the suffix.

Example: If the IPv6 address is 2001:4898:9:3:c069:aa97:fe76:2449, it should be converted to \\2001-4898-9-3-c069-aa97-fe76-2449.ipv6-literal.net.


Check more details about Huawei B618 4G Router here: https://www.4gltemall.com/huawei-b618-lte-cat11-router.html
Difference between Huawei E5786 and E5885

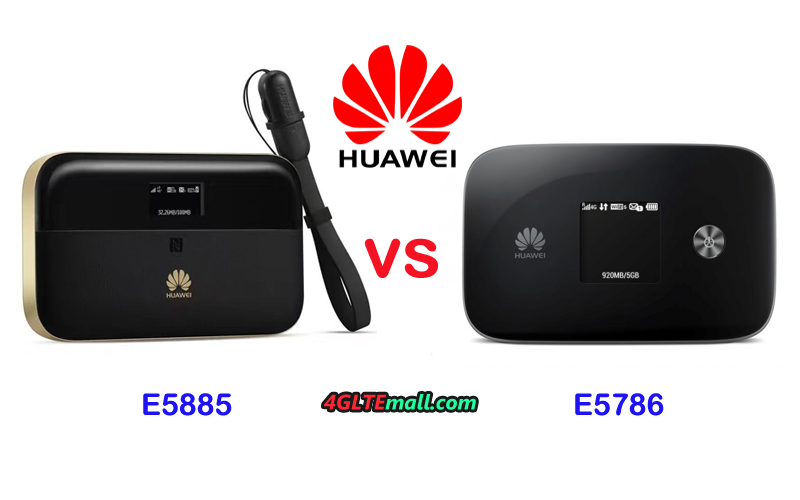
It has been months since the Huawei Mobile WiFi Pro 2 was released to market and we had introduced this new 4G router in details. If you had used the Huawei first LTE cat6 mobile router, you may know the Huawei E5786 4G hotspot. Today, we will have a look at what’s the difference between the Huawei E5885 and E5786.

Appearance

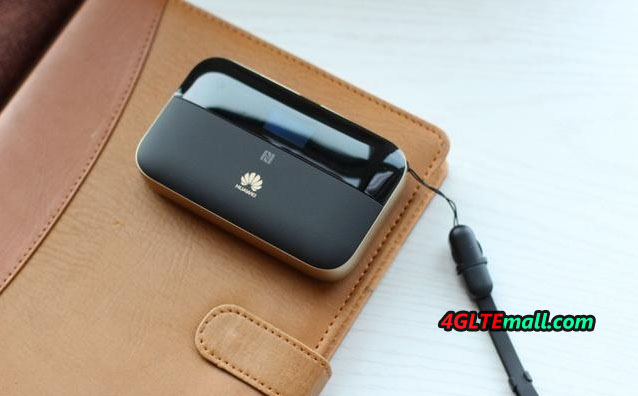
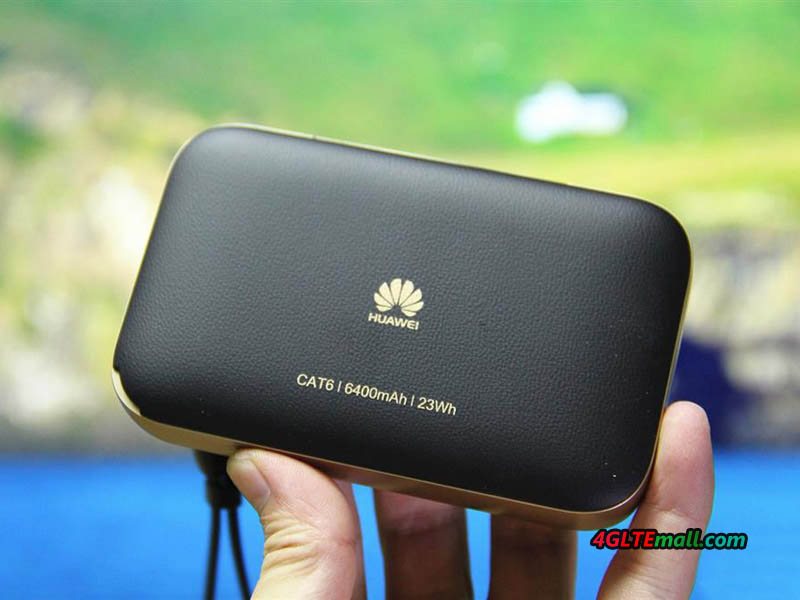
As we introduced before, the Huawei E5885(available model called E5885Ls-93a) follows the design of the Huawei E5770 Mobile WiFi Pro. On the front upper side, there is only a small screen to show connection information. The upper side is made of plastic but looks cool, the below part is made of high quality leather, which makes it feels very good in hand. Huawei logo is on the leather.  The whole body of Huawei E5786 is made of plastic, but it also feels good and slippery. The Huawei logo and power button are located at each side of the screen of E5786.

On the back of Huawei E5786, there is Huawei logo with “mobile WiFi”. The Huawei E5885 back has Huawei logo and words “CAT6/6400mAh/23Wh” which indicates the mobile router is a LTE Category 6 mobile hotspot with 6400mAh battery for 23 hours working time.

HUAWEI E5885Ls-93a Mobile WiFi Pro 2 back logo

The Huawei E5885 power and WPS button are located at the top edge. Between them, the Output and input USB ports, and the Ethernet port are covered by a small cap. The Huawei E5786 has a menu button on the top edge and USB port is at the opposite side.

Huawei E5786 back logo

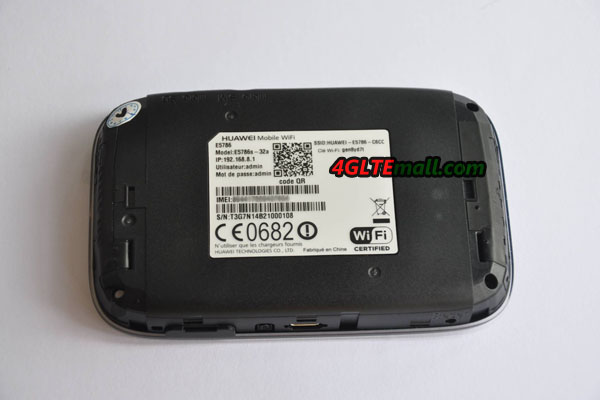
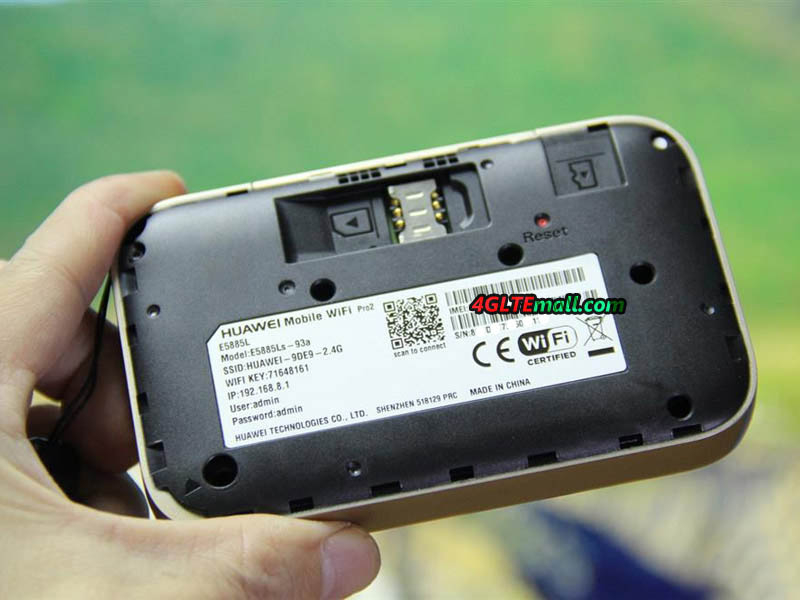
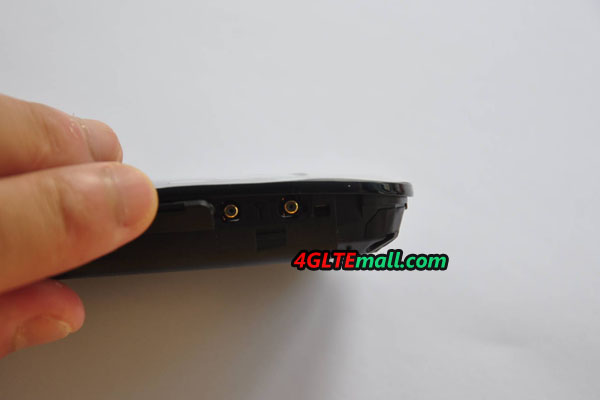
The back cover of Huawei E5885 and E5786 can be opened. In the Huawei E5885, we can see the SIM card slot and Micro SD card slot are located, where there is a reset button in red. Below is a label with the model number, IMEI number, SSID, WiFi key, IP address, user name and password. One QR code is also included so as to scan and connect. The Huawei E5786 also has the SIM card and MicroSD card slot lying together. What’s more, two TS-9 connectors for external antennas are covered by a cap. However, there is no antenna connector in Huawei E5885.

HUAWEI E5885Ls-93a Mobile WiFi Pro 2 sim card slot and sd card slot

Technical Specifications

The Huawei E5885 and E5786 are both LTE cat6 mobile hotspot which could support LTE download speed up to 300Mbps and upload speed to 50Mbps. They both provide variants for different carriers and various LTE frequency bands. The WLAN standard supports latest 802.11ac with dual band. Huawei E5786 could support up to 10 wireless devices to access internet through WiFi while the latest Huawei E5885 supports maximum up to 32 users. They both use the Micro SIM card. The Huawei E5885 provides one more connection by Ethernet cable while Huawei E5786 can only keep connected with SIM card.

Huawei E5786 antenna connectors

Battery

The back cover of the Huawei E5786 and E5885 can be opened, but the battery of them can’t be removed for change. The battery of Huawei E5786 is 3000mAh, which can keep working for 10 hours. While the Huawei E5885 has larger battery of 6400mAh, which would provide 23 hours working time. They both can charge other electric devices as a mobile power bank. However, the Huawei E5786 needs an accessory call AF18 adapter to make this function true. The Huawei E5885 can directly charge other devices without any problem.


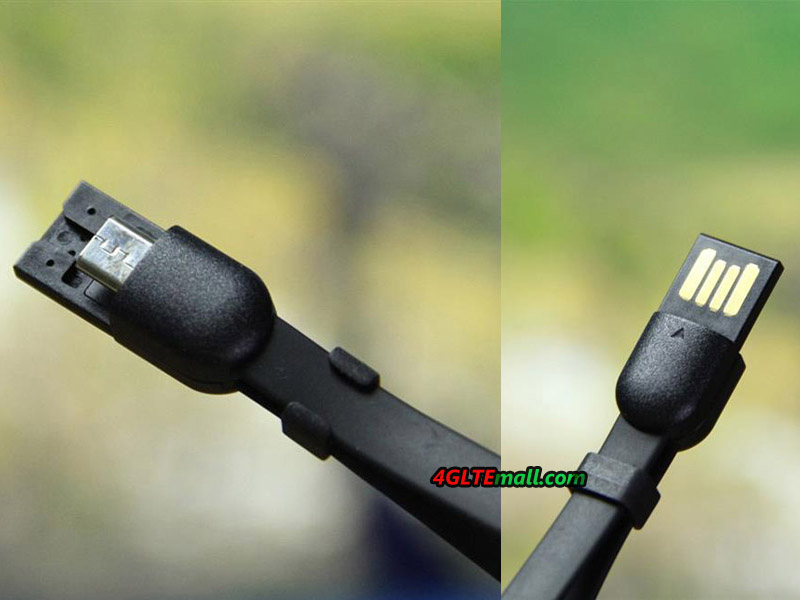
What’s more, the Huawei E5885 has a special USB cable with the device. The USB cable can be used as a lifting rope, which is really a smart and practical design. The Huawei E5786 uses the normal USB 2.0 cable for charging.

HUAWEI E5885Ls-93a Mobile WiFi Pro 2 USB Cable

From the comparison, we think there is no doubt that the latest Huawei E5885 is much better than the E5786, ont only on the design but also the practical functions. So if you are looking for a wonderful mobile hotspot, we think Huawei E5885 is good to recommend.

Huawei P10 Plus In Hand

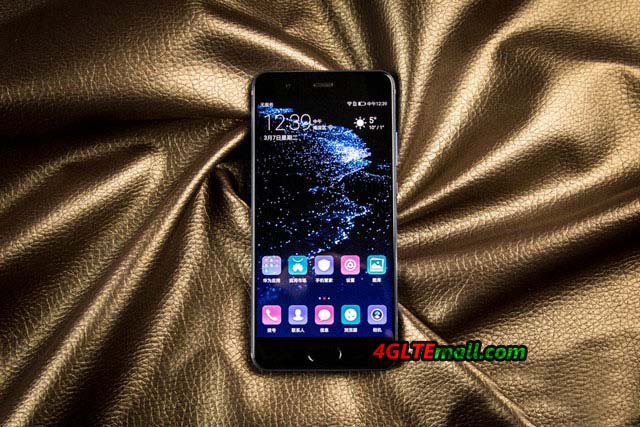
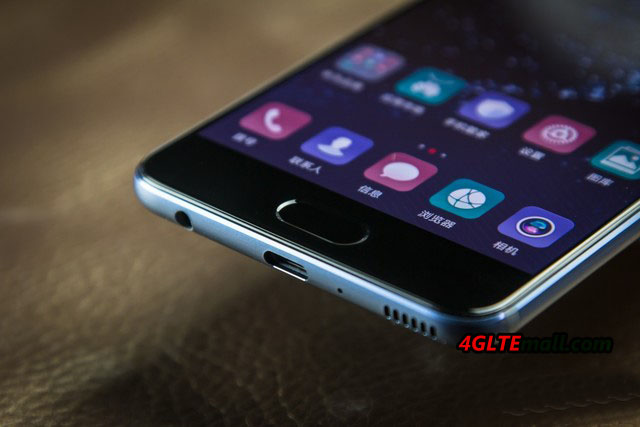
Together with the Huawei P10, Huawei launched the P10 Plus in spring 2017. The sister model offers a slightly larger display with better resolution and has a light-sensitive camera. The P10 Plus also has its own way in the case. The technology inside can be seen: as standard, there are 128 GB internal user memory, 6 GB memory and an Octa core processor of the Kirin 960 type. The 3750 mAh strong battery ensures a long runtime.


Larger Touchscreen

In a direct comparison, it’s obvious that the Huawei P10 Plus is a whole lot bigger than the normal P10. Instead of a 5.1 inch display, a 5.5 inch display is used; the resolution was increased from 1920 x 1080 pixels to 2560 x 1440 pixels. The display makes colors very strong thanks to AMOLED technology, but a slightly higher maximum brightness could be well tolerated. In most situations, the screen is bright enough, but in direct sunlight, many other smartphones such as the Samsung Galaxy S8 would benefit clearly.

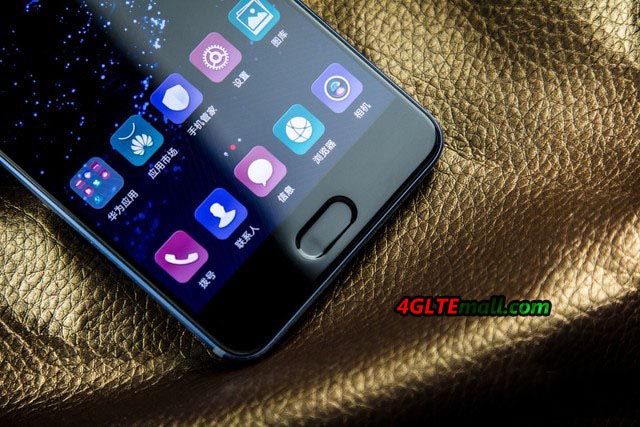
The fingerprint sensor is located under the display, same as on the P10, and can also be used as a replacement for the three software keys: Home, Back and Multitasking. Right soft-touch keys next to the fingerprint sensor are not available.


Beautiful case design

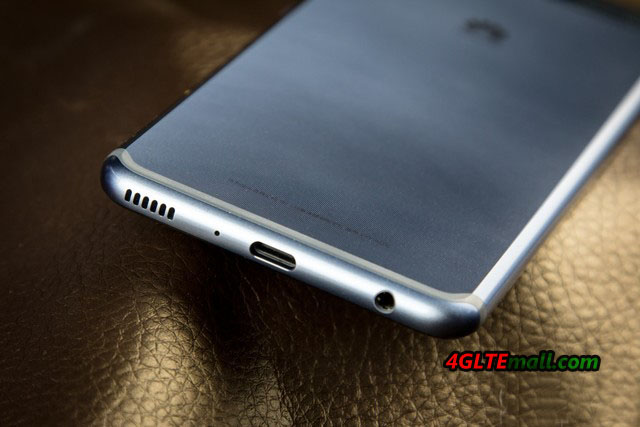
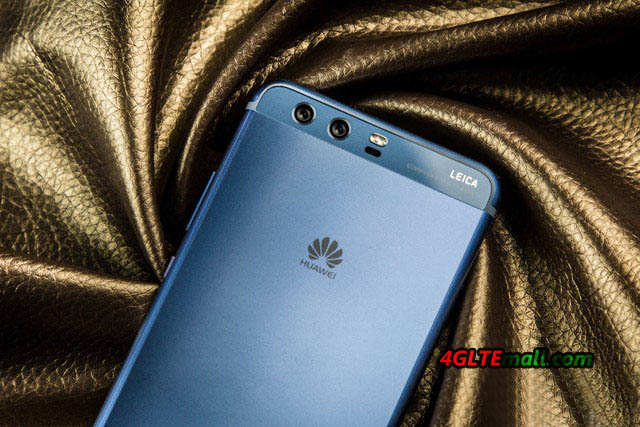
The case is made of metal for both the Huawei P10 and the P10 Plus. However, the rear panel has a crucial difference: the rear panel is slightly corrugated, the P10 is smooth. I personally like the back of the P10 Plus much better, it stands out from the crowd and the device does not seem so slippery in the hand. The case looks particularly nice in the colors blue (“Dazzling Blue”) and green (“Greenery”), depending on the light incident, the colors change with the viewing angle slightly, which is a nice effect.


Camera with f1.8 aperture

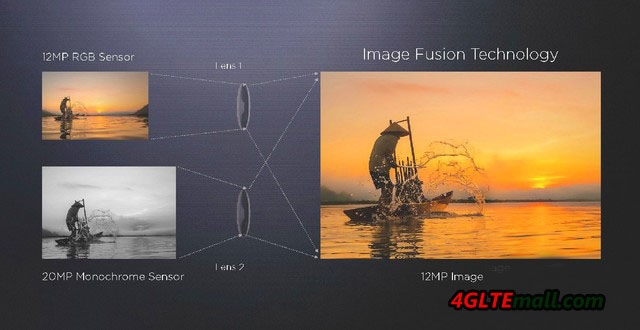
Regarding the camera, Huawei has improved the P10 Plus compared to the normal P10. There is a monochrome sensor with 20 megapixel resolution and a RGB sensor with 12 megapixels, the aperture of f1.8 is here the decisive difference to the P10. The photos were very good in the test, colors were accurately reproduced and the picture was always sharp and exactly as one expected. If you want to get a bit more out of the camera or want to test things like long-exposure with tripod, you can do this via the professional mode.


Other technology

As an operating system, Android version 7.0 is used in the Huawei P10 Plus. The EMUI 5.1 user interface runs on it. I personally find the software very appealing, as it offers some interesting additional features compared to the basic Android and partly quite close to the iOS operating system from Apple, which is quite positive. Other users criticize more often that the EMUI surface is too colorful and playful – a criticism, which is certainly justified in some places.


With 128 GB internal memory and optional memory expansion via MicroSD card, the P10 Plus offers more than enough memory space. The dual SIM function is available in Asia areas.


The HiSilicon Kirin 960 processor proved to be fast and powerful, as expected from an expensive high-end smartphone, of course. Also the modem could convince: Reception and voice quality were perfect. In the LTE network, the Huawei P10 Plus can use speeds of up to 500 MBit/s in many areas. This is possible in the many networks by means of three channel bundling (3CA) and 256QAM modulation.


Conclusion

The Huawei P10 Plus has convinced in the test especially through its very beautiful metal body and the very good camera system. Especially the case colors “Greenery” and “Dazzling Blue” are unique. Away from the camera and body, the Huawei P10 Plus is quite unspectacular: it offers up to Wireless Charging almost everything you expect from a flagship smartphone 2017 and works fast and flawlessly. The AMOLED display of the P10 Plus offers advantages in comparison to the LCD of the Huawei P10 black value, but annoying is the vulnerability to fingerprints. All in all, therefore, my conclusion is: if you think the normal P10 is too small or its body is too simple, you may need get a good upgrade with the P10 Plus!


ZTE UFi MF980 VS UFi MF970

With the upgrade of LTE network to LTE Advanced or Advanced PRO, the vendors are also trying to upgrade their wireless gadgets so as to meet the market demand. As we introduced the ZTE MF970 UFi last year, ZTE presented a new 4G LTE Router ZTE UFi MF980 as a successor. In this article, we will see what has been improved on the new ZTE MF980 UFi comparing to ZTE MF970.

Appearance

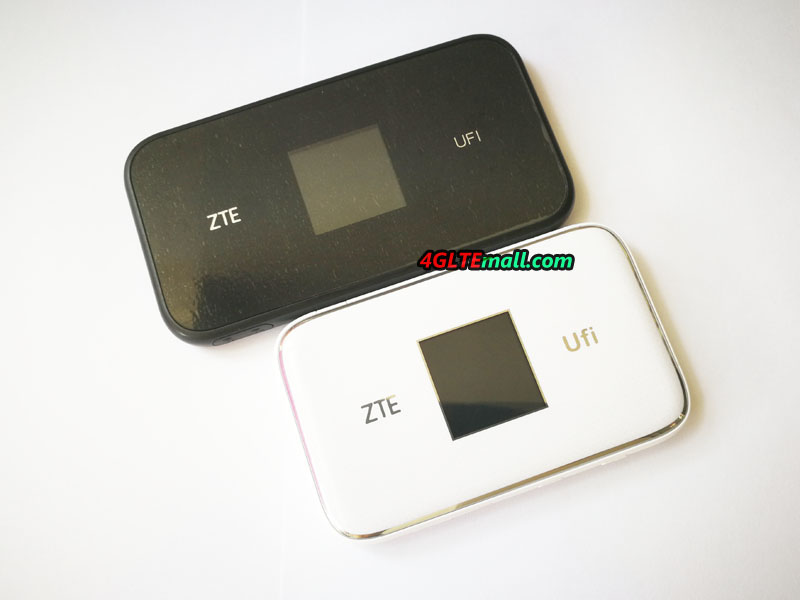
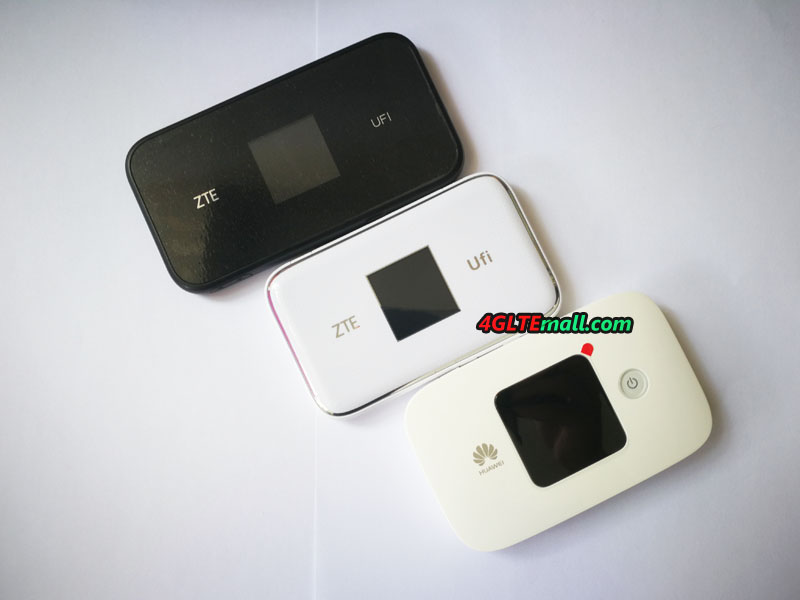
As we showed the images, ZTE MF970 UFi is in white color and the screen is on the middle of front with “ZTE” and “UFi” listed at each side of the 1.44 inch screen. Following this design, ZTE MF980 UFi also has a 1.44 inch screen and the same two words ZTE and UFi, but MF980 is in black color. But ZTE MF980 is thinner than MF970 and has long body.

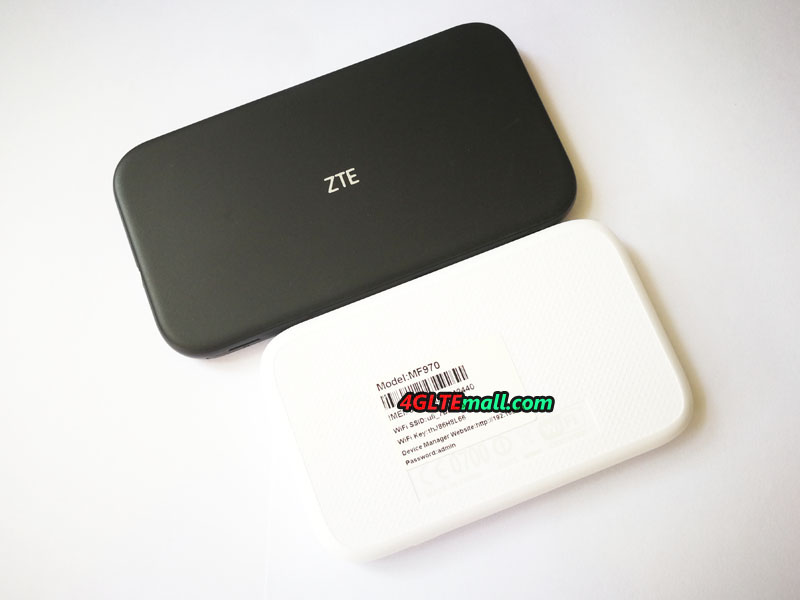
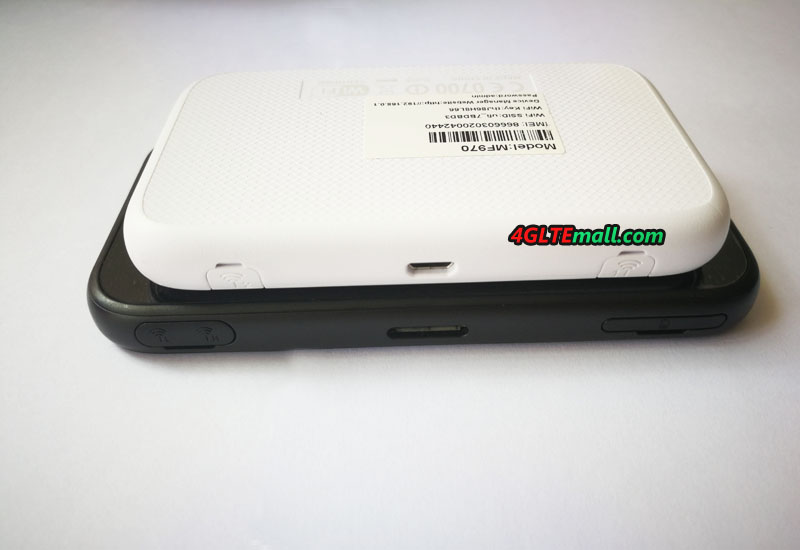
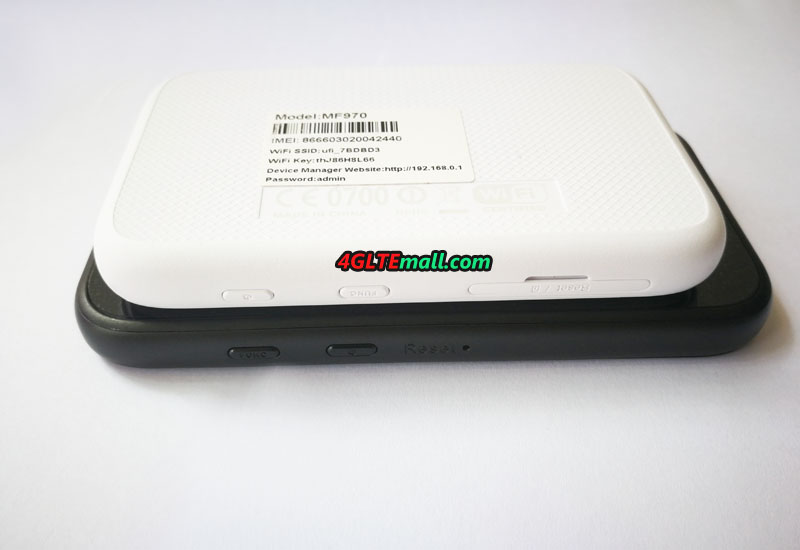
ZTE MF980 has power and func button on the top edge, which is same to ZTE MF970, but the SIM card slot is also with the two buttons in MF970, while the SIM card slot is at the opposite edge in ZTE MF980. The two connectors for external antenna for ZTE MF980 are located together while the MF970 has two connectors located at each side of the USB 2.0 port, where ZTE UFi MF980 has USB3.0 port. On the back, UFi MF980 has ZTE logo on while the MF970 shows some information about certificate for CE, WiFi and RoHS.

Technical Specifications

As we introduced before, the ZTE UFi MF970 is a LTE Category 6 mobile router which could support peak download speed to 300mbps and upload speed to 50mbps. In real product, it may be the Vodafone R226 or R226Z model. As the upgraded model for LTE advanced network, ZTE MF980 UFi supports LTE category 9 technologies and peak download speed to 450Mbps and upload speed to 50Mbps. They both support the common LTE FDD & TDD networks with 3G UMTS and 2G GSM networks backward. On this point, there is no doubt that ZTE MF980 UFi is more powerful than ZTE MF970 if working on LTE-A networks.

ZTE UFi MF970 could support up 14 wireless terminals to access internet when working with a valid SIM card, while the new MF980 UFi can support almost double of the qty to 32 WiFi-enabled devices. They both provide the WLAN standard to latest 802.11 ac with dual-band.


Battery

Like Huawei E5786 4G Mobile Hotspot, the ZTE MF970 and MF980 are both with the built-in battery, which can’t be removed for change. One question that we don’t understand is that the newer model ZTE UFi MF980 has battery capacity to 2200mAh when the predecessor MF970 has larger battery to 2300mAh. Many of the current 4G mobile router with same level are with 3000mAh battery or even more. What frustrating is the battery can’t be removed for backup battery. So if you would keep them working for long time, you’d better to take a bank power with large capacity. On this point, the latest Huawei E5885Ls-93a seems more powerful with LTE-A support and built-in large battery.

Summary

There is no doubt that the ZTE MF980 UFi is powerful on technical features, especially working on LTE advanced Pro networks for multiple users with group activities. But the decent battery would limit its long term performance. ZTE MF970 UFi is also good if you don’t quite need the LTE advanced pro network and just need a budget mobile pocket router. After reviewing the two ZTE LTE UFi, which one will you buy?