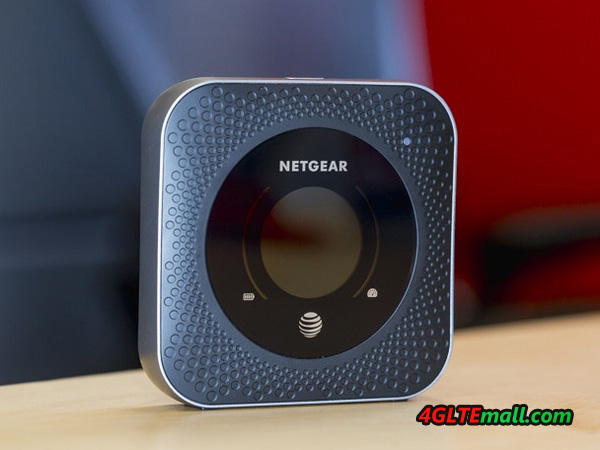
This chapter provides information about how to configure various aspects of the Netgear Nighthawk MR1100 mobile router such as WiFi settings, WAN settings, and router settings. The chapter covers the following topics:
- Select a WiFi Profile
- WiFi Settings
- Use WPS to Connect to the Mobile Router WiFi Network
- Universal Plug-N-Play
- Enable IP Pass-Through Mode
- Specify the IP Addresses That the Mobile Router Assigns
- Disable the DHCP Server Feature in the Mobile Router
Select a WiFi Profile
You can view or change the mobile router WiFi settings. The following WiFi profiles are available:
- Dual-band WiFi (2.4 GHz and 5 GHz). Connect 2.4 GHz and 5 GHz devices to transfer data at higher throughputs.
- 2.4 GHz WiFi. Use only the 2.4 GHz WiFi band.
- 5 GHz WiFi. Use only the 5 GHz WiFi band.
- Guest WiFi. Share your WiFi with temporary visitors without exposing the devices on your network or letting visitors access the mobile router web page.
- Turn Off WiFi. This turns off the WiFi signal from the mobile router. With this setting, you can only connect to the mobile router with a tethered USB connection.
Note: Whenever you change WiFi settings, any devices connected to the mobile router are disconnected and might need to be reconnected.
Select a WiFi Profile From the NETGEAR Mobile App
To select a WiFi profile:
- On your smartphone, connect to the mobile router’s WiFi network.
- Launch the NETGEAR Mobile app.
- Swipe down.
The dashboard displays.
- Tap Settings > WiFi > WiFi Profiles.
The WiFi Profiles displays.
- Tap a WiFi network to select it.
- Tap SAVE.
Your settings are saved.
Select a WiFi Profile from a Web Browser
To select a WiFi profile:
- From a computer that is connected to your network, launch a web browser.
- Enter http://m.home or http://192.168.1.1.
A login page displays.
- Enter the administrator login password.
The password is case-sensitive.
The dashboard displays.
- Select Settings > Setup > WiFi Profiles.
The WiFi Profiles page displays.
- Select the Enable button for the WiFi profile that you want to use.
- Click the Apply button.
The selected WiFi profile is activated.
WiFi Settings
Note:Whenever you change WiFi settings, any devices connected to the mobile router are disconnected and might need to be reconnected.
Specify WiFi Settings From the NETGEAR Mobile App
To specify the WiFi settings from the NETGEAR Mobile app:
- On your smartphone, connect to the mobile router’s WiFi network.
- Launch the NETGEAR Mobile app.
- Swipe down.
The dashboard displays.
- Tap WiFi.
The WiFi page displays.
- Change the settings.
Your settings are saved.
Specify WiFi Settings from a Web Browser
To select a WiFi profile or create a custom profile on the mobile router web page:
- From a computer that is connected to your network, launch a web browser.
- Enter http://m.home or http://192.168.1.1.
A login page displays.
- Enter the administrator login password.
The password is case-sensitive.
The dashboard displays.
- Select Settings > Setup > Wireless.
The Wireless Network page displays the settings for the 2.4 GHz and the 5 GHz WiFi bands and global WiFi settings.
- Change the settings as needed.
By default, the Broadcast WiFi Name SSID check box is selected for each network so that the WiFi network name displays in the list of WiFi networks for computers or mobile devices.
- To change the global WiFi settings, adjust the WiFi standby time or the WiFi range.
- Click the Apply button.
Your settings are saved.
When you change your profile options (including disabling or enabling either WiFi network), any devices connected to the mobile router are disconnected and might need to be reconnected.
Use WPS to Connect to the Mobile Router WiFi Network
To connect to the mobile router WiFi network, you can find the network and connect or you can use WPS. If the device is WPS enabled, you can use the WPS method to connect the device without using the WiFi password.
Use WPS from the NETGEAR Mobile App
To add a WPS-enabled WiFi device from the NETGEAR Mobile app:
- On your smartphone, connect to the mobile router’s WiFi network.
- Launch the NETGEAR Mobile app.
- Swipe down.
The dashboard displays.
- Tap WiFi.
The WiFi page displays.
- Tap WPS.
- Within two minutes, tap or click the WPS button on the mobile device or computer that you want to connect.
Your mobile router and the mobile device or computer communicate and establish the connection.
Use WPS From a Web Browser
To add a WPS-enabled WiFi device from the mobile router web page:
- From a computer that is connected to your network, launch a web browser.
- Enter http://m.home or http://192.168.1.1.
A login page displays.
- Enter the administrator login password.
The password is case-sensitive.
The dashboard displays.
- Select Wireless or Guest Network.
The Wireless or Guest Network page displays.
- Click the WPS button for the network.
The WPS page displays.
- Choose the WPS method that you want to use:
- WPS button pairing. If the device you want to connect includes a WPS button, click the WPS button pairing button and, within two minutes (120 seconds), press the device’s WPS button.
- Enter WPS PIN. If a WPS pin is associated with the device that you want to connect, click the Enter WPS PIN button and enter the device’s WPS PIN.
Your mobile router and the wireless device communicate and establish the connection.
Universal Plug-N-Play
Universal Plug N Play (UPnP) helps devices, such as Internet appliances and computers, access the network and connect to other devices as needed. UPnP devices can automatically discover the services from other registered UPnP devices on the network. UPnP is beneficial when you use applications such as multiplayer gaming, peer-to-peer connections, or real-time communications such as instant messaging or remote assistance (a feature in Windows XP). By default, UPnP is enabled in the mobile router.
Turn UPnP Off or On From the NETGEAR Mobile App
By default, UPnP is enabled in the mobile router, but you can disable and enable this feature.
To disable or enable Nighthawk M1 UPnP:
- On your smartphone, connect to the mobile router’s WiFi network.
- Launch the NETGEAR Mobile app.
- Swipe down.
The dashboard displays.
- Tap Settings.
The Settings page displays.
- Tap General.
The General page displays.
- Tap the Enable UPnP slider.
UPnP toggles off or on.
Turn UPnP Off or On From a Web Browser
By default, UPnP is enabled in the mobile router, but you can disable and enable this feature.
To disable or enable UPnP:
- From a computer that is connected to your network, launch a web browser.
- Enter http://m.home or http://192.168.1.1.
A login page displays.
- Enter the administrator login password.
The password is case-sensitive.
The dashboard displays.
- Select Settings > Advanced Settings > Other.
The Router Settings page displays.
- Select the UPnP Disable or Enable button.
UPnP toggles off and on.
- Click the Apply button.
Your settings are saved.
Enable IP Pass-Through Mode
To turn off the mobile router functionality and assign the network IP address directly to the attached device, enable IP pass-through.
If you make this change, the attached device restarts using a different driver configuration.
WARNING: If you enable this feature, WiFi is disabled and you must use a USB cable to tether the device.
Note: This feature is available to Windows computer users. If you are a Mac user, do not enable this option because you will be unable to access your device.
To enable IP pass through mode:
- From a computer that is connected to your network, launch a web browser.
- Enter http://m.home or http://192.168.1.1.
A login page displays.
- Enter the administrator login password.
The password is case-sensitive.
The dashboard displays.
- Select Settings > Setup > Router Setup.
The ROUTER SETUP page displays.
- Select the IP PASSTHROUGH ON button.
The default selection is AUTO.
Specify the IP Addresses That the Mobile Router Assigns
By default, the router acts as a Dynamic Host Configuration Protocol (DHCP) server. The router assigns IP, DNS server, and default gateway addresses to all computers connected to the LAN. The assigned default gateway address is the LAN address of the router.
These addresses must be part of the same IP address subnet as the router’s LAN IP address. Using the default addressing scheme, define a range between 192.168.1.2 and 192.168.1.254, although you can save part of the range for devices with fixed addresses.
To specify the pool of IP addresses that the mobile router assigns:
- From a computer that is connected to your network, launch a web browser.
- Enter http://m.home or http://192.168.1.1.
A login page displays.
- Enter the administrator login password.
The password is case-sensitive.
The dashboard displays.
- Select Settings > Setup > Router Setup.
The ROUTER SETUP page displays.
- Enter the starting IP address and the ending IP address.
- Click the Apply button.
Your settings are saved.
Disable the DHCP Server Feature in the Mobile Router
By default, the mobile router acts as a DHCP server. The router assigns IP, DNS server, and default gateway addresses to all computers connected to the LAN. The assigned default gateway address is the LAN address of the router.
You can use another device on your network as the DHCP server, or specify the network settings of all your computers.
To disable the DHCP server feature in the mobile router:
- From a computer that is connected to your network, launch a web browser.
- Enter http://m.home or http://192.168.1.1.
A login page displays.
- Enter the administrator login password.
The password is case-sensitive.
The dashboard displays.
- Select Settings > Setup > Router Setup.
The ROUTER SETUP page displays.
- Clear the Use NETGEAR Mobile as DHCP server check box.
- Click the Apply button.
Your settings are saved.
- (Optional) If this service is disabled and no other DHCP server is on your network, set your computer IP addresses manually so that they can access the mobile router.